
How Ice Dams Form
Ice dams require three conditions: (1) snow cover on the roof; (2) heat escaping from the attic that warms the upper roof surface above 32°F; (3) cold temperatures at the roof eave, where the overhang is unheated by the attic below. Meltwater flows down the warm upper roof, reaches the cold eave overhang, and refreezes — building an ice dam that blocks drainage. As the dam grows, backed-up water finds pathways under shingles and into the attic.
Why Colorado Ice Dams Are Worse Than Other States
Colorado's snowfall patterns create ideal ice dam conditions: heavy wet snowfalls followed by warm sunny days. Denver's 300+ annual sunny days mean rapid solar-assisted melting even in January, while overnight temperatures drop sharply (often 40°F+) — refreezing the meltwater at eaves. These same Denver climate patterns that drive ice dams also cause snowmelt basement flooding and humidifier-related mold. This rapid thermal cycling produces more ice dam events per winter than regions with more consistent cold weather.
Which Denver Areas Are Most Affected
Higher-elevation communities experience more severe ice dam formation:
- Castle Rock (6,224 ft) — most severe in the metro
- Parker (5,869 ft)
- Green Mountain, Lakewood — elevated terrain, consistent snow accumulation
- Golden — foothills terrain with localized heavy snowfall
- Boulder foothills — heavy mountain snow influence
Attic Mold from Ice Dams: What Happens
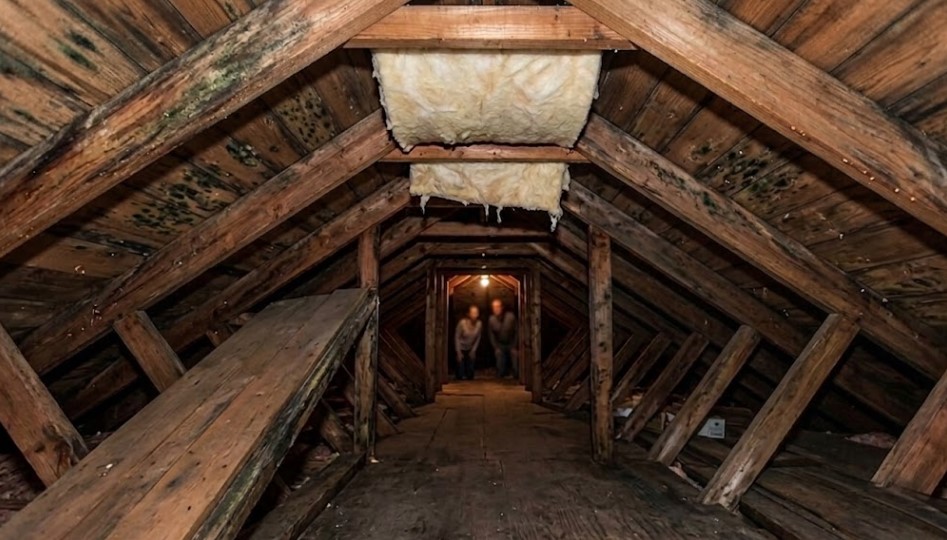
When ice dam meltwater enters the attic, it saturates fiberglass insulation (which loses its R-value when wet and doesn't dry quickly), soaks into OSB or plywood roof sheathing, and wets rafters and ridge board framing. At temperatures above 40°F — which occur during Denver's warm sunny days even in midwinter — this moisture creates ideal conditions for mold growth within 24–48 hours, often requiring professional attic mold remediation. OSB sheathing is particularly vulnerable because its surface is rough and holds moisture.
How to Identify Ice Dam Water Entry from Inside Your Home
Ice dams are often discovered only after water damage appears inside. Know these warning signs — they indicate active or past water intrusion from ice dam backup:
- Water stains or tide lines on ceilings near exterior walls — especially in the corners of top-floor rooms or directly below the eave line
- Bubbling or peeling paint on ceilings in upper-floor rooms after a heavy snow followed by warm days
- Wet or discolored drywall on upper-floor exterior walls — water can travel down wall cavities from the roof
- Ice or frost on interior surfaces of attic access hatches — indicates heat loss and humidity reaching the cold attic space
- Visible icicles hanging from eaves during or after a thaw — while not definitive (icicles also form from normal eave drip), icicles larger than 6 inches forming at the eave edge indicate probable ice dam conditions
- Musty smell in top-floor rooms after winter — attic mold developing from ice dam moisture can be detectable from inside the living space
Immediate Action When You Suspect Ice Dam Water Entry
If you discover water staining or active dripping during a snow/thaw event:
- Document immediately — photograph all water stains and measure the affected area. Time-stamp the photos. This documentation is critical for insurance claims.
- Place towels or buckets — manage active water to protect flooring and belongings while you address the source.
- Do not open the ceiling immediately — if there is a visible bulge in drywall from trapped water, consult a professional before cutting. Releasing trapped water carelessly can cause additional damage.
- Ventilate the attic if safe to access — if temperatures allow, opening the attic hatch briefly can help dry the attic space. Do not go on the roof during ice dam conditions.
- Call a roofing or ice dam removal professional — steam removal is the safest method. Avoid chipping with metal tools, which damages shingles.
- Start a mold assessment within 48–72 hours — if the structure was wet for more than 24 hours, mold assessment is warranted even if no mold is yet visible.
DIY Ice Dam Removal: Calcium Chloride Method
A commonly used DIY approach is the calcium chloride sock method — this creates channels in the ice dam to allow meltwater to drain rather than back up under shingles:
- Fill a nylon stocking or mesh bag with calcium chloride ice melt (not rock salt — salt damages shingles and vegetation).
- Lay the filled stocking vertically across the ice dam — perpendicular to the eave edge, so it creates a drainage channel through the dam when it melts.
- Leave the stocking in place until it melts through the ice to the shingle surface.
Risks of DIY ice dam removal: Working on a snow-covered or icy roof is extremely dangerous. Calcium chloride can damage asphalt shingles over time if applied repeatedly. This method creates drainage channels but does not remove the ice dam — it is a temporary mitigation measure, not a solution. Do not use a heat gun, hair dryer, or flame torch near the roof.
Prevention
- Adequate attic insulation (R-49 to R-60 in Colorado climate zone 5)
- Continuous soffit-to-ridge ventilation to maintain cold attic temperature
- Air sealing at attic floor to prevent warm air from bypassing insulation
- Ice and water shield membrane at eaves (minimum 24 inches beyond exterior wall)
- Whole-home humidifier calibration — excess humidity rises into attic
Prevention ROI: Insulation vs. Attic Mold Remediation
Many Denver homeowners delay attic insulation upgrades due to cost. The comparison with attic mold remediation costs makes the case clearly:
| Measure | Typical Cost | Outcome |
|---|---|---|
| Attic air sealing + insulation upgrade (to R-49) | $2,500–$6,000 | Eliminates primary ice dam cause; improves energy efficiency; qualifies for federal tax credits |
| Electric heat cable installation at eaves | $500–$2,000 | Mitigates ice dam formation; does not address insulation deficiency |
| Professional ice dam removal (steam) | $400–$1,200 per event | Temporary; must be repeated each significant snow event |
| Attic mold remediation (sheathing mold) | $3,000–$8,000 | Reactive cost after mold has established; does not prevent recurrence without insulation work |
| Attic mold remediation (structural, sheathing replacement) | $8,000–$20,000+ | Severe cases with structural damage to sheathing and rafters |
Prices shown are examples only. For an accurate quote for your property, call (720) 964-0332 — free specialist consultation.