
Professional mold remediation follows a structured protocol governed by the IICRC S520 Standard and Reference Guide for Professional Mold Remediation. Each step exists for a specific reason — and understanding the process helps you verify that your contractor is doing the job correctly, not cutting corners.
Overview: The 7 Stages of Professional Mold Remediation
| # | Stage | Who Does It | Typical Duration |
|---|---|---|---|
| 1 | Assessment & Scope of Work | Inspector / Remediator | 2–4 hours |
| 2 | Moisture Source Repair | Plumber, roofer, or contractor | Varies (must complete before Step 3) |
| 3 | Containment Setup | Remediation crew | 2–4 hours |
| 4 | HEPA Vacuuming & Material Removal | Remediation crew | Half day to 2 days |
| 5 | Antimicrobial Treatment | Remediation crew | 2–4 hours + dwell time |
| 6 | Structural Drying | Remediation crew / equipment | 2–5 days |
| 7 | Clearance Testing | Independent inspector (preferred) | 2–4 hours + 24–48h lab turnaround |
Stage 1: Assessment and Scope of Work
Before any work begins, a professional inspector or project estimator walks the entire affected area with a moisture meter, thermal imaging camera, and visual assessment protocol. In Denver this typically includes:
- Measuring moisture content in all affected structural materials (drywall, framing, concrete)
- Identifying the moisture source — foundation crack, plumbing failure, HVAC condensation, etc.
- Mapping the full extent of mold growth, including suspected hidden mold behind walls
- Documenting findings with photographs for your records and any insurance claim
The output of this stage is a written scope of work — a document that specifies exactly what materials will be removed, what containment will be established, what antimicrobial product will be used, and what the clearance standard is. Do not authorize work without a written scope.
Denver-specific note: Inspectors performing air sampling at this stage must apply altitude corrections to their sampling pump flow rates. Denver's 5,280 ft elevation means air is 17% less dense than at sea level — uncorrected pumps return artificially low spore counts.
Stage 2: Moisture Source Repair
This is the step most homeowners underestimate — and the one most commonly skipped by contractors who are motivated to begin billable remediation work quickly. If the moisture source is not repaired before or during remediation, mold will return within months.
Common moisture sources in Denver homes and who fixes them:
- Foundation crack leaking snowmelt — polyurethane injection by a waterproofing contractor
- Burst or leaking pipe — licensed plumber
- Roof leak / ice dam intrusion — roofing contractor + insulation upgrade
- HVAC condensate overflow — HVAC technician
- Window well drainage failure — drainage contractor or DIY gravel replacement
A reputable remediator will either coordinate these repairs directly or explicitly require written confirmation that they have been completed before beginning remediation. Be wary of any contractor who proceeds with remediation without discussing the moisture source.
Stage 3: Containment Setup
Containment prevents mold spores disturbed during remediation from spreading to clean areas of your home. IICRC S520 specifies two levels of containment depending on project size:
- Limited containment (small jobs, <10 sq ft): a single layer of poly sheeting over doorways and openings into the work area
- Full containment (larger projects, structural mold): 6-mil poly sheeting floor to ceiling, sealed with tape at all seams; dedicated entry/exit zipper door; negative air pressure maintained by HEPA air scrubber exhausting outside the home
The negative air pressure setup is critical — it ensures that when workers enter or exit the containment zone, any air movement goes into the zone, not out into the clean area of your home. Without negative pressure, containment is significantly less effective.
You should be able to see or verify:
- Poly sheeting sealed at all edges
- A HEPA air scrubber running and exhausting through a window or door to outside
- Workers wearing full PPE (N100 respirator, Tyvek suit, nitrile gloves, eye protection) before entering the zone
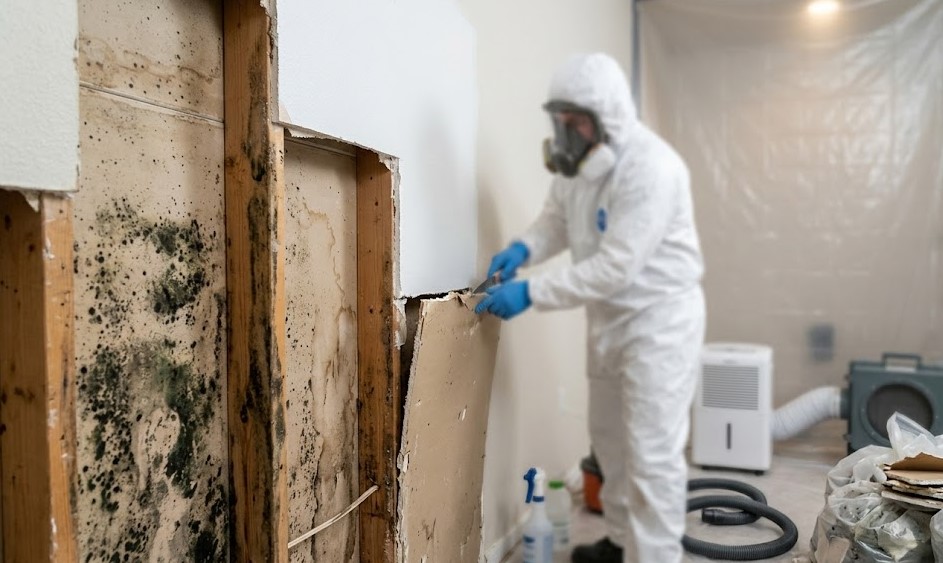
Stage 4: HEPA Vacuuming and Material Removal
This is the physical removal stage. The sequence matters:
- HEPA vacuuming first — dry mold colonies are HEPA vacuumed before any disturbance or wet cleaning. This captures loose spores before they become airborne.
- Removal of contaminated porous materials — drywall, insulation, carpet, and wood framing with mold growth must be physically removed, not cleaned in place. These materials are bagged in sealed poly bags inside the containment zone and removed without passing through the clean area of the home.
- Wire brushing of non-porous structural surfaces — concrete block, metal framing, and other hard surfaces can be cleaned in place after porous materials are removed.
What "containment envelope" means in practice: all debris goes from the work area into sealed bags, into the containment zone, and out through a dedicated waste exit — never through your living space. If workers are carrying unsecured debris through your house, containment has been breached.
How much drywall gets removed? The IICRC S520 standard is to remove drywall to 12 inches beyond the last visible mold or the last elevated moisture reading — whichever is greater. Some contractors remove less to minimize cost; this is a shortcut that often leads to return calls.
Stage 5: Antimicrobial Treatment
After physical removal, exposed structural surfaces are treated with an EPA-registered antimicrobial product. This step kills residual mold on surfaces that could not be physically removed (e.g., concrete block, metal framing). Key points:
- The product should be named in your scope of work — not described as "antifungal spray"
- Common EPA-registered products include Concrobium, Foster 40-80, and Benefect Decon 30
- Dwell time (the time the product must remain wet on the surface to be effective) must be observed — typically 5–10 minutes depending on the product
- An encapsulant may be applied after antimicrobial treatment on exposed structural wood — this is acceptable on wood that has been cleaned but cannot be physically replaced
Encapsulation is not a substitute for removal on drywall, insulation, or carpet. These materials must come out. Encapsulation is only appropriate for structural wood where removal would compromise the building structure.
Stage 6: Structural Drying
After mold removal, structural materials must be dried to acceptable moisture content before reconstruction can begin. This stage is often the longest, and Denver's altitude creates a specific challenge:
Dehumidifiers and air movers rated for sea-level conditions perform approximately 15–20% less efficiently at Denver's 5,280 ft elevation, where air is less dense. Professional-grade altitude-rated equipment is required to achieve target moisture content within a reasonable project timeline. Ask your contractor what equipment they use and confirm it is rated for high-altitude operation.
Target moisture content before reconstruction:
- Dimensional lumber framing: below 19% MC
- Concrete / masonry: below 4% WME
- OSB subfloor: below 16% MC
Your contractor should provide moisture readings at the start and end of the drying phase, documenting that materials reached acceptable levels before clearance testing.
Stage 7: Clearance Testing
Clearance testing is post-remediation air sampling that verifies mold spore concentrations have returned to normal background levels after work is complete. This is the only objective way to confirm the job was done correctly.
Who should perform clearance testing? Best practice — and some insurance policies require it — is to use an independent inspector who did not perform the remediation. A remediator who performs their own clearance testing has a financial incentive to pass the project. An independent inspector has no such incentive.
A passing clearance test will show:
- Indoor spore concentrations at or below the simultaneously collected outdoor control sample
- No species present indoors in significantly higher proportion than outdoors (particularly for Stachybotrys, Chaetomium, and Aspergillus/Penicillium)
- Moisture meter readings confirming structural drying is complete
If the clearance test fails, the remediator must re-do the affected work at no additional charge. A written warranty specifying this obligation should be part of your contract before work begins.
Denver altitude note: the independent inspector performing clearance testing must apply altitude corrections to air sampling pump flow rates — the same requirement that applies to the initial assessment.
After Clearance: Reconstruction
Mold remediation ends with a passed clearance test. Reconstruction — replacing drywall, insulation, flooring, and repainting — is a separate scope of work and is typically handled by a general contractor or the homeowner. Most remediation companies do not include reconstruction in their base estimate.
Before reconstruction begins:
- Confirm clearance test results are in writing
- Confirm moisture readings are at acceptable levels
- Confirm the moisture source that caused the original mold has been repaired
Rebuilding over elevated moisture — even with a passed clearance test — will produce new mold within months.
Red Flags During a Remediation Project
- Contractor begins removal before establishing containment
- No negative air pressure machine running during active mold removal
- Workers not wearing N95 or better respirators inside the work area
- Debris carried through living areas in open bags or containers
- Contractor offers to "encapsulate" drywall rather than remove it
- Contractor performs their own clearance testing without offering an independent option
- No written scope of work or written warranty provided before work begins
What the Process Costs in Denver
The total cost of professional mold remediation in Denver varies widely based on scope:
| Project Type | Typical Range |
|---|---|
| Small bathroom / isolated surface mold (<10 sq ft, non-porous) | $300–$1,000 |
| Single wall section / small basement area | $1,500–$4,000 |
| Moderate basement (post-snowmelt flooding) | $4,000–$12,000 |
| Large basement with finished space demolition | $10,000–$25,000 |
| HVAC / whole-home mold | $8,000–$35,000+ |
Prices shown are examples only. For an accurate quote for your specific situation, call (720) 964-0332 — free specialist phone consultation.